Getting Started
Welcome to the SwipeLab Researcher Guide. This section covers how to log in to the dashboard and navigate the main interface.
Researcher Account
Researchers are STARDBI users so they do not need to register separately. Researchers can simply log in using their existing STARDBI account credentials.
Navigation Overview
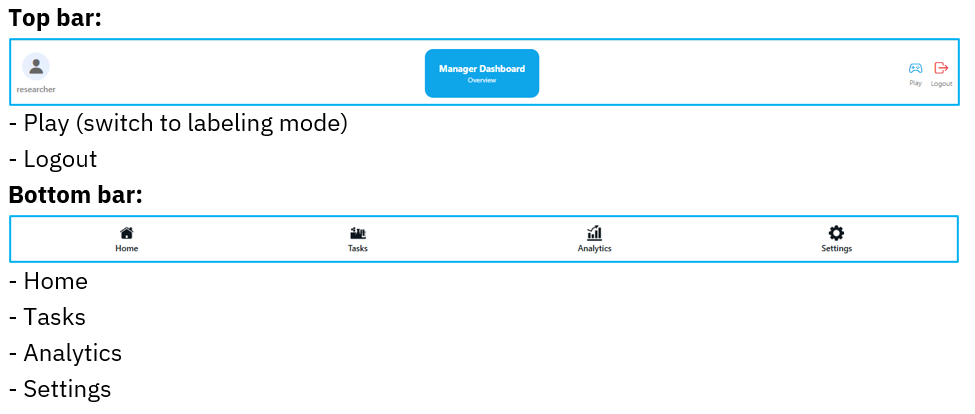
Top bar:
- 🎮 Play — switch to labeling mode
- 🚪 Logout
Bottom bar:
- 🏠 Home
- 📋 Tasks
- 📊 Analytics
- ⚙️ Settings
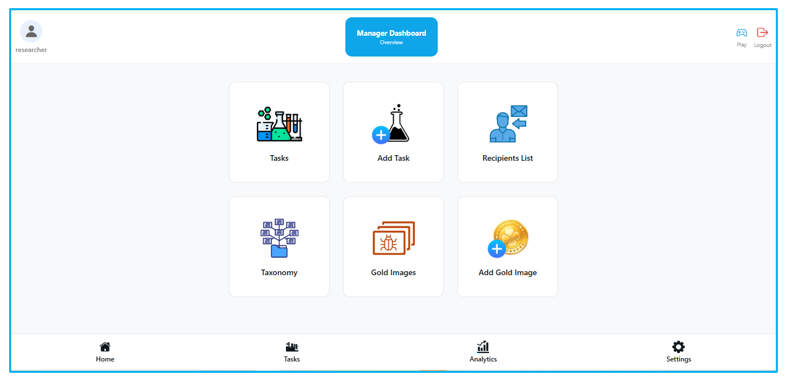
In the Home screen, quick access buttons are available for:
- 📋 Tasks
- ➕ Add Task
- 🌿 Taxonomy
- 🖼️ Gold Images
- ➕ Add Gold Image
- 👥 Recipients List
Creating a New Task
Tasks are the core unit of work in SwipeLab. By pressing Add Task on the Home screen, you can create a new task. Follow the steps below to set up your task.
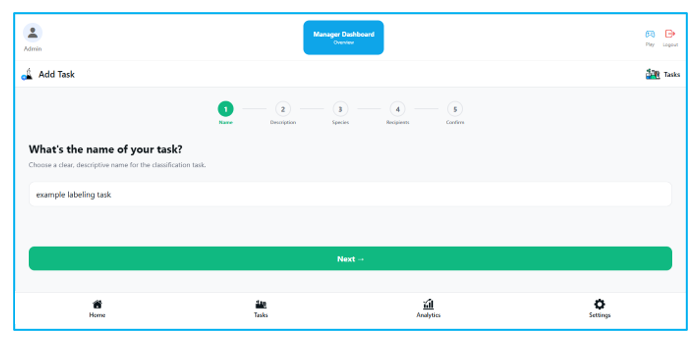
Step 1 — Choose a Task Name
Enter a clear, descriptive name for your task. This name will be visible to volunteers and helps identify the task in your dashboard.
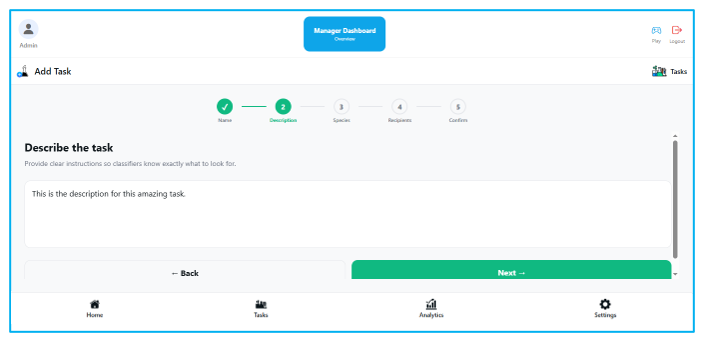
Step 2 — Add a Description
Write a brief description of the task. This helps volunteers understand the context and goal of the classification they are performing.
Step 3 — Select Species & Upload Reference Images
Select one or more species for the task. For each species selected, you must upload at least one reference image. These reference images help volunteers understand what they are classifying.
- You can select multiple species in a single task.
- Each species requires at least one reference image to be uploaded.
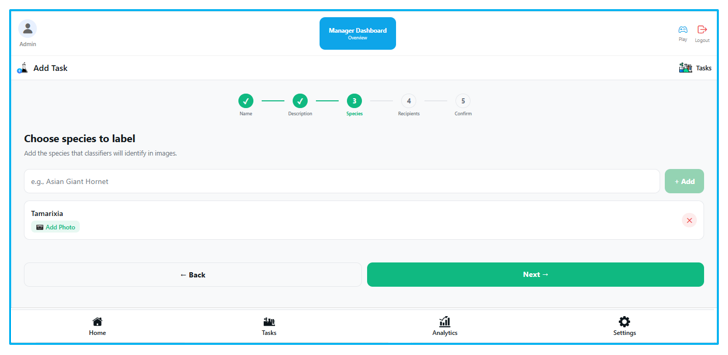
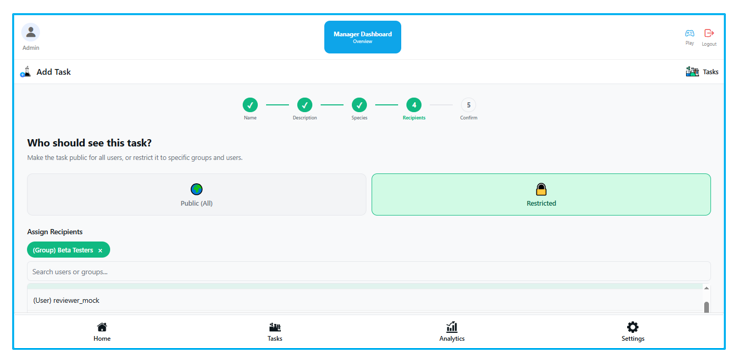
Step 4 — Choose Recipients
Decide who can participate in your task:
- 🌐 Public — the task is open to all volunteers on the platform.
- 🔒 Restricted — only volunteers in your selected recipient groups can access the task.
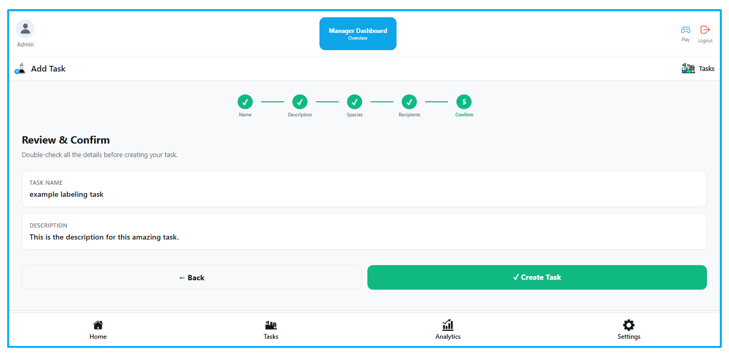
Step 5 — Confirm and Create Task
Review all the details you have entered. Once you are satisfied, press Create Task to publish it. The task will immediately become available to the selected recipients.
Monitoring Task Progress
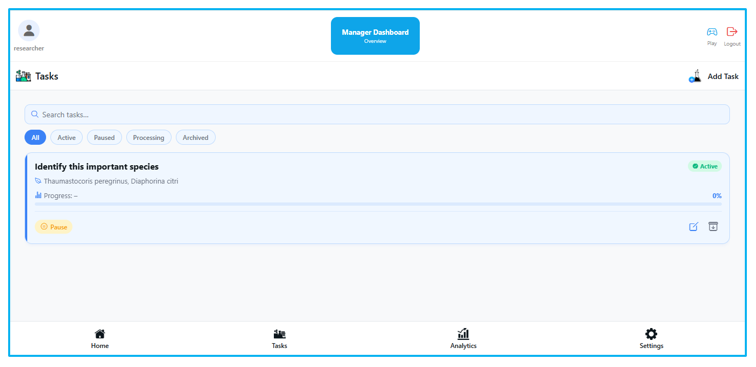
The Tasks screen is your central hub for managing all tasks you have created or co-manage. Press the Tasks button from the bottom navigation bar to access it.
Managing Your Tasks
The task list displays all your active, paused, and archived tasks at a glance. From here you can take quick actions on any task without opening it:
- ▶️ Activate — make the task live and visible to the selected recipients.
- ⏸️ Pause — temporarily suspend volunteer access while preserving all existing classifications.
- 📦 Archive — close a completed task and move it to the archive for record-keeping.
- ✏️ Edit — modify the task name, description, species, or recipient settings at any time.
Viewing Task Details
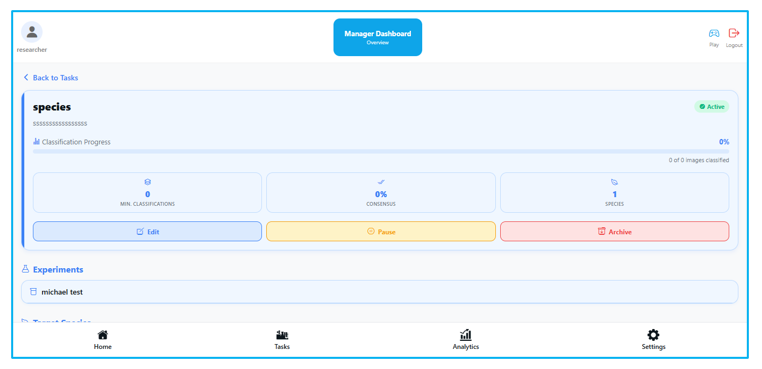
Select any task from the list to open its full detail view. Here you can monitor real-time progress, review classification statistics, and get a breakdown of volunteer activity for that specific task.
Managing Recipient Groups
Recipient groups allow you to control which volunteers have access to a restricted task. All groups created by researchers are listed in the Recipients List, accessible from the Home screen. Groups are used when creating or editing a task with Restricted visibility.
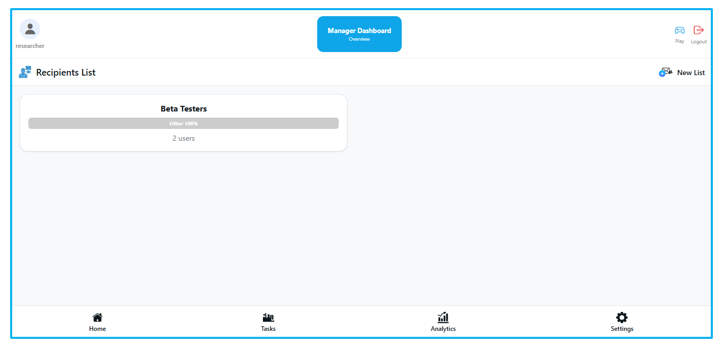
Recipients List Overview
The Recipients List shows all groups you have created. Each group can be assigned to one or more restricted tasks, ensuring that only the intended volunteers can participate.
Creating a New Group
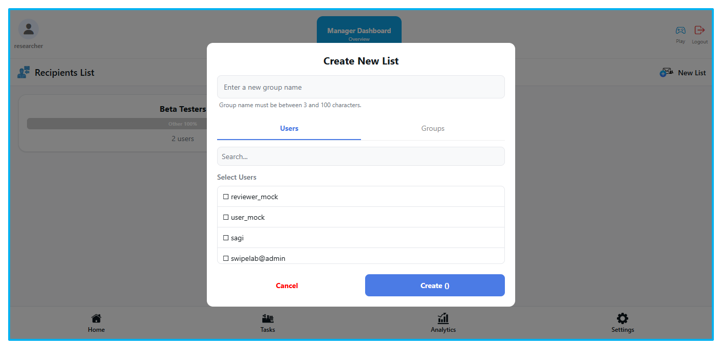
To create a new recipient group, tap the Add button from the Recipients List screen. Give the group a name and add the volunteers or sub-groups you want to include. Once created, the group will be available to select when setting up restricted tasks.
Managing Group Members
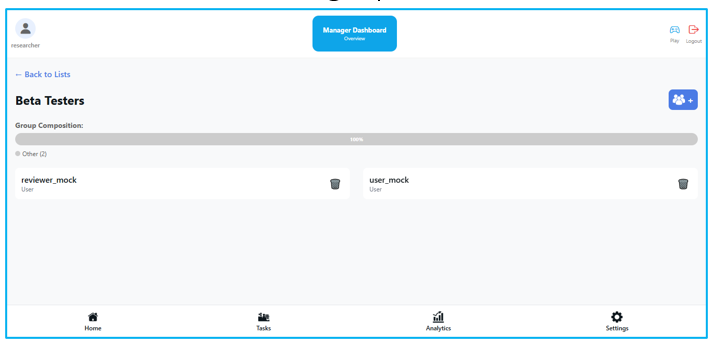
Select any group from the Recipients List to open its member view. From here you can review who is in the group and make changes:
- ➕ Assign users or sub-groups — add individual volunteers or entire groups to this recipient group.
- 🗑️ Remove members — remove a volunteer from the group without affecting their account or other group memberships.
Taxonomy
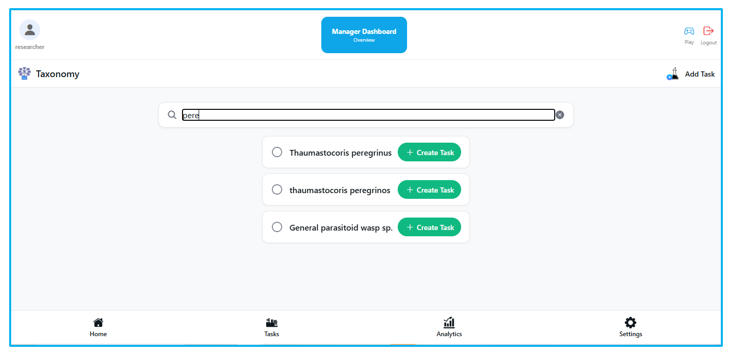
The Taxonomy screen lets you browse and search all species available in the SwipeLab database. It serves as a quick starting point for creating tasks — instead of manually entering species names, you can find and select them directly from the taxonomy catalogue.
Searching & Selecting Species
Use the search bar to find species by name. You can select multiple species at once and then immediately create a task pre-populated with your selection — saving time compared to building a task from scratch.
Analytics
Content coming soon.
Exporting Labeled Data
Once a task reaches sufficient coverage, export the labeled dataset in CSV or JSON format for use in ML training pipelines.
Content coming soon.
Uploading & Managing Gold Images
Gold Images are special reference images used to validate and measure volunteer credibility. SwipeLab periodically shows these images to volunteers and compares their answers to the known correct answer — helping ensure labeling quality across all tasks.
Viewing & Managing Gold Images
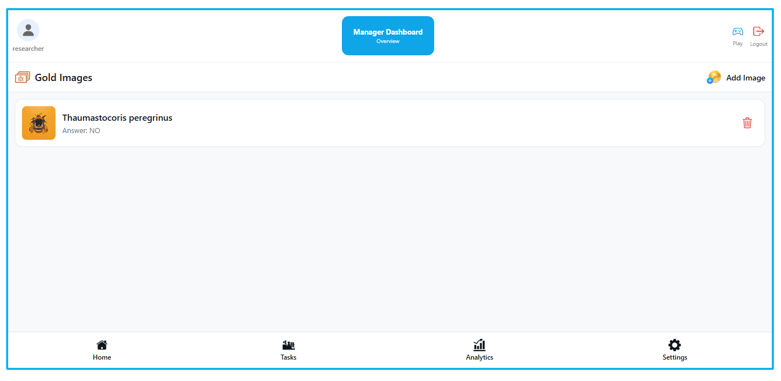
The Gold Images gallery gives you a full overview of all validation images currently in the system. From here you can review each image and remove any that are no longer needed.
- 📋 View all gold images — browse the complete list of validation images, with species labels and difficulty ratings.
- 🗑️ Delete images — remove a gold image if it is outdated, incorrect, or no longer relevant to your tasks.
Adding a Gold Image
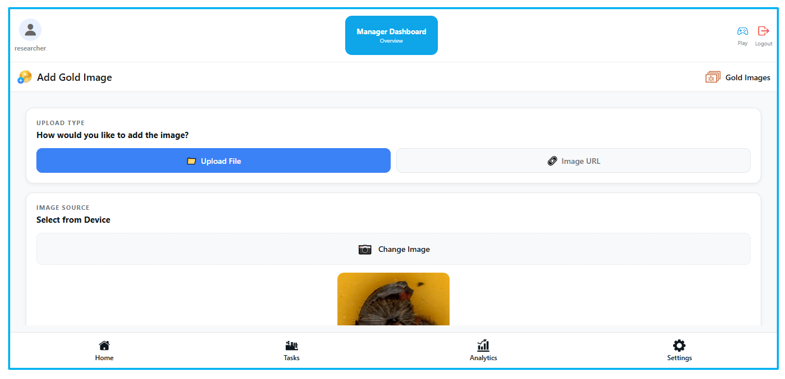
To add a new gold image, press Add Gold Image from the Home screen. Gold images are used to test volunteer credibility — they are shown during labeling sessions and scored against the known correct answer.
Step 1 — Upload the image
Provide the image either by uploading a file from your device or by pasting a direct image URL. Once the image is successfully loaded, a green "Ready" indicator will appear, confirming the image is valid and ready to use.
Step 2 — Select the species
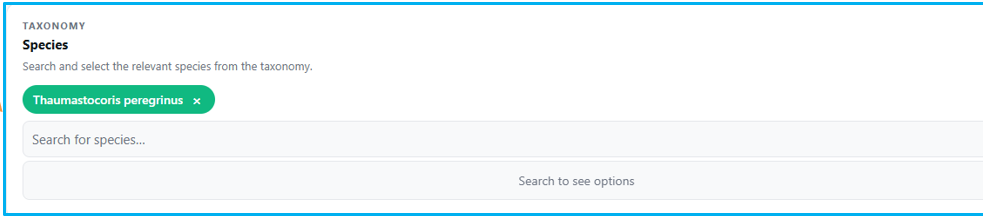
Choose the species this image represents. This is the species the volunteer will be asked to identify when they encounter this gold image during a labeling session.
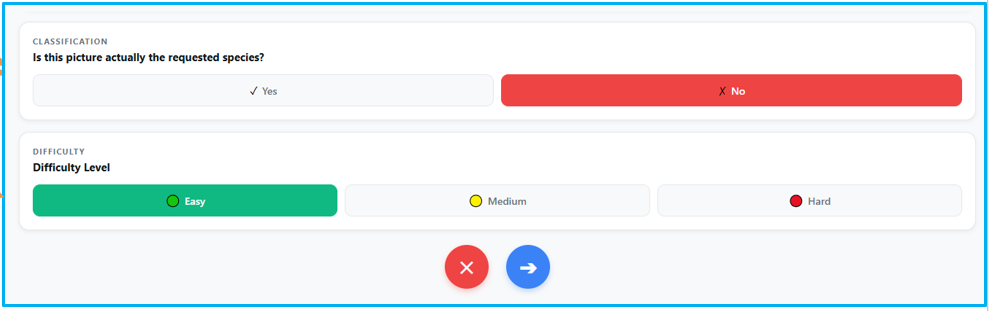
Step 3 — Mark the correct answer
Indicate whether the image correctly represents the selected species or not. This becomes the ground-truth answer that volunteer responses will be scored against.
- ✅ Yes — the image is a valid example of the selected species.
- ❌ No — the image does not represent the selected species (useful for testing negative recognition).
Step 4 — Set the difficulty
Assign a difficulty level to the gold image. Difficulty affects how much weight the image carries when calculating a volunteer's credibility score — harder images that are answered correctly contribute more.
Credibility Scores
SwipeLab's credibility system scores each volunteer based on consensus agreement and accuracy against gold images. High-credibility users' classifications carry more weight.
Content coming soon.